Using Puppeteer with Deno 🦕
8 min read - 2021-04-07
This blog post is part of a a blog post series where we use Deno to build different applications. We’ll go from CLIs to scrapping tools, among others. You can find the other posts here.
We previously explored some of Deno’s premises and how it addresses specific Node.js problems. But that’s not why we are here today.
Today we’ll explore deno-puppeteer, a port of puppeteer to deno. We’ll demonstrate how Deno can make it even simpler to write puppeteer scripts and applications.
Deno with Puppeteer
Puppeteer was a changing piece of technology. It enabled developers to directly use JavaScript to control their headless browser of choice (Chrome & Firefox) without all the burden that it used to be.
Together with great documentation and an engaged community, Puppeteer has been one of the best solutions when it comes to writing applications connecting with headless browsers.
A few months ago, Luca Casonato, one of Deno’s core team members, ported Puppeteer into Deno.
Announcing Puppeteer for Deno: a framework to control headless Chromium or Firefox Nightly from Deno.
— Luca Casonato (@lcasdev) December 30, 2020
Create UI tests, take screenshots, generate PDFs, or test Chrome Extensions, all with the same API you are familiar with from Puppeteer in Node.https://t.co/D2ijvdFuuK
This is, by itself, an interesting topic to explore: how much did the code have to change to get it working in Deno. But that’s not what we’re doing here today.
As Deno gains its place among script tools, being able to use puppeteer is another interesting step taken. With deno-puppeteer, users can now benefit from the ease of use of Deno while writing puppeteer scripts.
In this blog post we will build a CLI utility that demonstrates just that.
The full code is available here.
Writing a Puppeteer script
The objective of the CLI utility we’ll build is to check a website for visual changes in different resolutions.
This tool will compare the website with the last time it checked, creating an image with the difference. It can work as a QA assurance tool, something that runs after deploying a website to double-check the changes done and that it is working fine in different screen resolutions.
To achieve this, we’ll use a couple community packages and tools. Some are functions from Deno’s standard library, others are just existing Node.js packages
- pngjs - PNG encoder/decoder in JS
- pixelmatch - A JS image comparison library
- Deno file-system APIs (
readFileandwriteFile)
We’ll use jspm to make sure pngjs and pixelmatch (both Node.js packages) are ES6 module compatible. This will make sure that they work on Deno (yes, Deno is fully ES6 compatible!).
The CLI application will have two modes/features:
- Screenshot the website state in different resolutions
- Compare website with previous versions (running with the
--diffflag)
As you might have guessed, we’ll be using puppeteer to access the website and take the screenshot, and the code is quite straightforward.
import puppeteer from "https://deno.land/x/[email protected]/mod.ts";

// cut for brevity

const browser = await puppeteer.launch({
  defaultViewport: viewPort,
  args: ['--no-sandbox', '--disable-setuid-sandbox'],
});

const page = await browser.newPage();

// website is a cli parameter
await page.goto(website, {
  waitUntil: "networkidle2",
});

const screenshot = await page.screenshot();
After having a screenshot, it is just a matter or saving it on the filesystem or comparing it with the one previously stored.
To save to the file system we’d just use Deno.writeFile. To compare with the previously saved image we’ll use pixelmatch and pngjs, as shown by the script below.
import pixelmatch from "https://jspm.dev/pixelmatch";
import { PNG } from "https://jspm.dev/pngjs";

// Cut for brevity

const newImage = await parsePNG(screenshot as Uint8Array);
const oldImage = await parsePNG(await Deno.readFile(screenshotPath));
const diff = new PNG(viewPort);

pixelmatch(
  newImage.data,
  oldImage.data,
  diff.data,
  viewPort.width,
  viewPort.height,
  { threshold: 0.5 },
);

const buffer = PNG.sync.write(diff);
await Deno.writeFile(
  // domain is the website domain, resolution the screen resolution
  `${screenshotBasePath}/diff-${domain}-${resolution}.png`,
  buffer,
  { create: true },
);
The full code is available here.
Again, the code is quite straightforward. We’re using Deno runtime APIs to access the filesystem, and the third-party packages to decode and compare both images.
If the Deno APIs look strange to you, fear nothing, Deno’s documentation is quite detailed and thorough.
Documentation
Any questions regarding the available APIs and how they work is delighfully explained in Deno’s documentation (https://doc.deno.land/).
Deno supports directly importing modules by URL in the code, and the documentation isn’t any different. By using the provided URL (https://doc.deno.land) plus the URL to a package, we get a beautifully designed page with the package types and documentation.
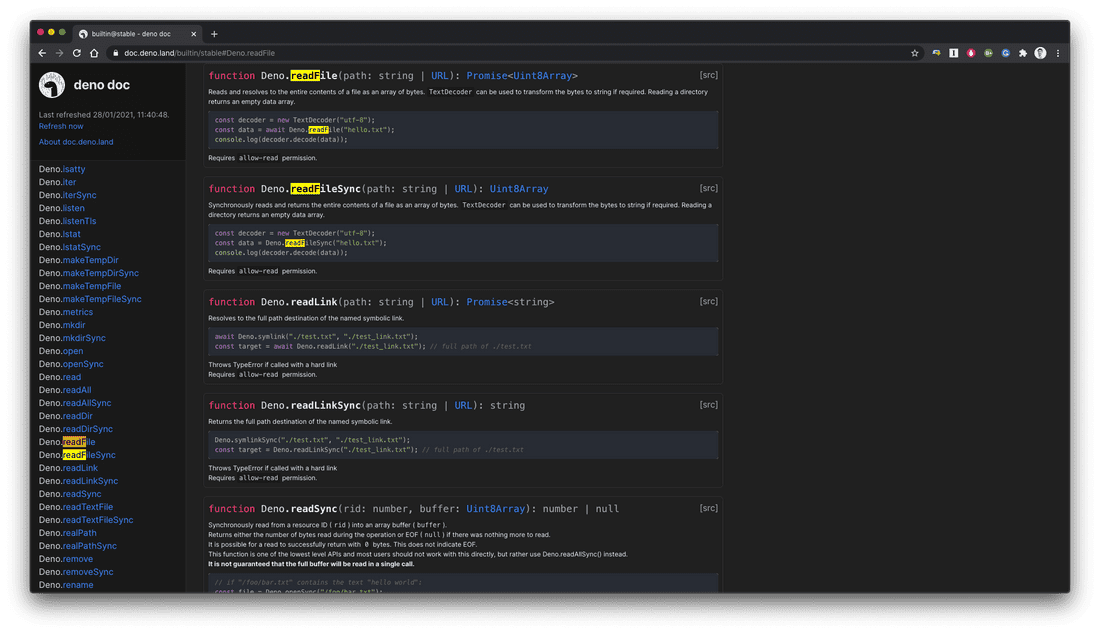
For instance, to check readFile documentation we just need to navigate to https://doc.deno.land/builtin/stable#Deno.readFile and this is what we get.

This is possible to be used with a direct GitHub link to any TS file, ex: https://doc.deno.land/https/raw.githubusercontent.com/timonson/djwt/master/mod.ts
Executing the code
After having Deno installed on the system, executing the code is the simplest of tasks. We can just use deno run plus the path to the file we want to execute (in our case we’ve called it mod.ts).
However, and as we previously mentioned, all Deno programs run in a sandbox thus we need to give your program the specific permissions it needs to execute.
For our specific usecase, and because puppeteer needs quite a lot of permissions, it needs to access the environment, network, file system, and have the ability to run processes.
Due to deno-puppeteer using a few Deno APIs that are still under active development (and subject to changes), we will need to run our program with the --unstable flag.
$ deno run --allow-read --allow-write --allow-net --allow-env --allow-run --unstable mod.ts https://picsum.photos --diffThe only thing that’s missing is the environment variable required by puppeteer that points to the browser’s executable path, as mentioned in the documentation. We can add that variable to .bashrc or use it inline, as we’re doing below:
$ PUPPETEER_EXECUTABLE_PATH=/Applications/Google\ Chrome.app/Contents/MacOS/Google\ Chrome deno run --allow-read --allow-write --allow-net --allow-env --allow-run --unstable mod.ts https://picsum.photosWith this our program will go to https://picsum.photos and save a screenshot in the current path, inside a folder called screenshots.
The next time we run this script (with the --diff flag) it will compare with the previously stored screenshots and will generate an image like the following:

And that’s it!
We have a simple program that will let us check if a website has changed since the last time we checked.
We can now use another Deno command (available in the toolchain) to have this utility at hand whenever we need it - the script installer.
Using Deno’s script installer
To conclude, we’ll explore one tool Deno includes in its binary, the script installer, made available by the install command.
This is one of many tools like a test runner, linter, code formatter that you get access to after installing Deno.
The install command will wrap any Deno program in an executable bash program and add it to /usr/bin, making it available across the system.
$ deno install --name website_compare --allow-read --allow-write --allow-net --allow-env --allow-run --unstable mod.ts
Check file:///Users/alexandre/dev/personal/deno/puppeteer/mod.ts
✅ Successfully installed website_compare
/Users/alexandre/.deno/bin/website_compare
Note how we’re running the install command with the --name flag to set the name of the executable. We’re also setting the permissions the script needs to execute, this is the only time we’ll need to do it.
After doing this, we can run the website_compare wherever we are in our system.
$ website_compare https://picsum.photos
Diff stored at /Users/alexandre/dev/personal/deno/puppeteer/screenshots/diff-picsum-mobile.png
And this completes our objective for the blogpost!
We’ve demonstrated how can we benefits of Deno’s simplicity to make it even easier to write puppeteer scripts.
As you’ve seen everything works the same as in Node.
The big difference is that we can take advantage of some Deno advantages. Those are things like native TypeScript support, a clean standard-library, no node_modules and fine-grained permission control.
Conclusion
Today we’ve explored deno-puppeteer, a package that makes it possible to write puppeteer scripts on Deno.
Scripting is one of many use cases for Deno, and one of the reasons Deno was created, but definitely not the only one.
If you’re interested in knowing more about Deno and how to use it to build tools and web applications, make sure you checkout my recently launched book Deno Web Development. In the book, we carefully explain all the mentioned Deno features (and many others) while building real-world applications.
This article (and code) was written by me and my friend Felipe Schmitt, a declared puppeteer fan who is always ready to explore new pieces of technology. He’s was also a big contributor to the book, by providing insane amounts of feedback and suggestions.
We’d like to hear what you think about it! If you have any questions, make sure you it us on Twitter or LinkedIn. I’ll leave the links below.
If you want to read more about Deno, check out the other posts in this series.
Best,